The beautiful art form of mosaic has caught your attention and you want to know how to make mosaics at home? Luckily there are different ways to create them at many levels of difficulty and equipment needed. We've put together tips and tricks gathered from mosaic experts and craftspeople alike to share with you here.
Follow these steps to make a mosaic at home with mosaic tiles:
- Prepare the base
- Layout your mosaic design on a base-sized paper
- Get your glue and brush handy
- Glue each tile to your base following your design
- Wait for the glue to dry
- Apply grout to the spaces between your mosaic tile
- Wipe the grout from the surface of the tiles with a damp cloth or sponge
- Let dry
So, let's look at each of these steps in a bit more detail. Then we'll talk about some fun mosaic projects, materials you can use, and ways to hang your finished projects. Just keep reading!

The Steps For Making A Mosaic At Home
Mosaic is an ancient art form that dates back to the 3rd millennium BC. Historically, small pebbles were used to create larger imagery. This grew into the use of ceramic tile and glass tile. Now, mosaic projects can be made with tile, glass, beads, buttons, paper, and more. But the concept is the same, tiny spots of color built together to create a larger pattern or image.
For the purposes of our step by step how-to, we're going to look at using readily available glass mosaic tiles on a wooden backing board. Both of these items are readily available for purchase at crafts stores or online.
Prepare The Base
Decide on how large of a mosaic you'd like to make and get a wooden base that works with your design. Blank craft bases are available online in rectangles, circles, and the sizes you want. We suggest sealing the wood with a dilution of Mod Podge and water. Simply brush it on, let it soak in, and dry overnight. Try to keep your brush streaks smooth without bumps. You want an even surface to glue your tiles onto.
18-Inch Birch Plywood Circle

Click here to see more on Amazon.
Decoupage Set

Click here for this set on Amazon.
Layout Your Mosaic Design On A Similar Sized Piece Of Paper
If you're working with the above circle, trace the shape onto a separate piece of paper. Then lay out your mosaic tiles on the extra paper. This way you can work out any kinks in your design before you've glued them in place on the wood.
Be sure to leave an even amount of spacing between tiles for your grout. Too close and it will be difficult to get the grout in, too wide or uneven and your design may disappear in the grout.
Get Your Glue And Brush Handy
Though you can certainly spread glue across all of your wooden base and then simply affix your tiles to it, you run the risk of the glue drying too quickly. We prefer the method of dabbing a bit of glue directly to the back of each tile or to go in small tile sections on the board base.
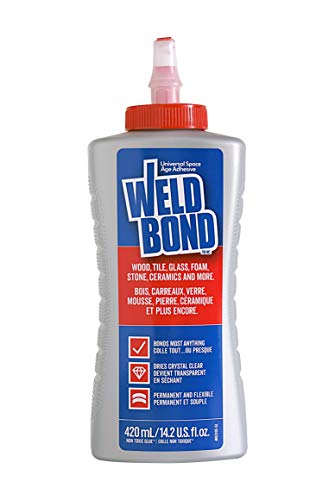
WeldBond adhesive is many mosaic makers go-to adhesive for mosaics. The handy applicator nozzle works well instead of a brush if you're not using tiny mosaic pieces.
Click here for this product on Amazon.
Glue Each Tile To Your Base Following Your Design
Now you're ready to glue the pieces onto your base. Simply transfer your design from where you've laid it out on your pattern paper over to your wooden base. Keep gluing until it's all in place. Now it must dry for at least 24 hours before applying any grout.
1,000-Piece Mixed Tile Pieces

There are so many different types of mosaic tiles available in bulk lots. These come in diamonds, triangles, and squares which gives versatility when creating the layout of your design.
Click here for this glass tile lot on Amazon.
200-Piece Circle Tile Lot

If you want some circles in your design, these round flats come in a large lot for mosaics.
Click here for this lot on Amazon.
Apply Grout To The Spaces Around Your Tiles
Now it's time to add the grout. Grout is available pre-mixed in lots of colors, so be sure and think about which one will work best with your imagery. The lizard mosaic above utilizes black grout to great advantage.
Grouting is a lot like icing a cake. Use a plastic putty knife or spatula and evenly press your grout into all the spaces left between your tiles. Once you have it filled in, get a sponge or rag and dampen it. Then wipe off all of the excess grout from the tops of your tiles. This may take a couple of passes.
Tile Grout

Click here for this grout on Amazon.
Putty Knife

Click here for this product on Amazon.
Let It Dry
Now it's time to let your mosaic dry. Once the grout has dried in between all the tiles, you may need to give it another wipe with a clean damp cloth to get the slight film or residue remaining off of the tiles. And ta-dah! Your mosaic is done. We'll look at ways to hang it later in this post.
What Are Some Mosaic Techniques For Beginners?
If you are looking for great projects for beginners to teach about the art of mosaic, why not start with something as simple as construction paper? This paper is super inexpensive and can even be bought pre-cut into mosaic squares. There's no need for grout or other messy equipment. All you need is a backing paper, mosaic paper squares, scissors, and a glue stick or Elmer's glue.

Click here for these paper mosaic squares on Amazon.
Once you or your kids have gotten the hang of creating mosaic designs with paper, then jump over to using glass or ceramic mosaic tiles. You'll be hooked for sure.
What Are Some Mosaic Ideas For Beginners?
We found some fun projects to do with household projects (and more) that are a perfect way to get your feet wet in mosaics without requiring a huge investment of time and money.
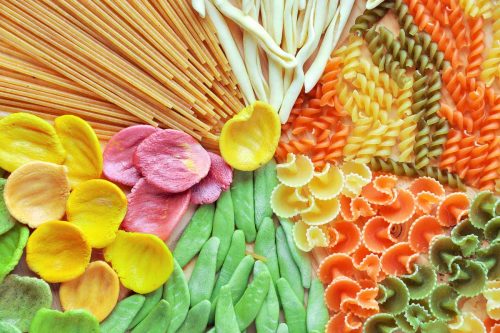
Use Pasta And Air Dry Clay
If you want to go a little more dimensional than construction paper but still want to keep it simple, this painted pasta and clay mosaic project is fun. Here are the steps:
- Decide what type of dried pasta (or pastas) you want to use.
- Dye them different colors with food dye then let them dry.
- Roll out a slab of air-dry clay using a rolling pin (or a wine bottle).
- Press your pasta pieces into the clay (which acts as your "grout" and backing board).
- Let dry.

Click here for this air-dry clay on Amazon.
Jar Lid Mosaic Magnets Or Ornaments
Don't recycle those jar lids! Use them for mosaic projects instead. You can follow the steps for traditional mosaic (gluing in the pieces, then grouting) or you can press in a base of air-dry clay-like with the pasta project. Either way, this is a super fun project. Here are the steps:
- Pick out a jar lid and either paint or sand the outside part.
- Glue in your mosaic design (or press in air-dry clay to fill the cavity).
- Fill with grout and wipe off excess (or press in mosaic pieces).
- Let dry.
- Glue on a magnet or a hook to the back of the lid.

These stick-on magnets are great for all types of crafts.
Click here for them on Amazon.
Get A Mosaic Kit
Another great way to start out with mosaics is to use a kit. These kits come with all of the instructions you need as well as the perfect amount of materials. You don't have to think about design; instead, you simply learn how to do the craft. Kits are a great way to enter into a new crafting realm.
Mosaic Stepping Stone
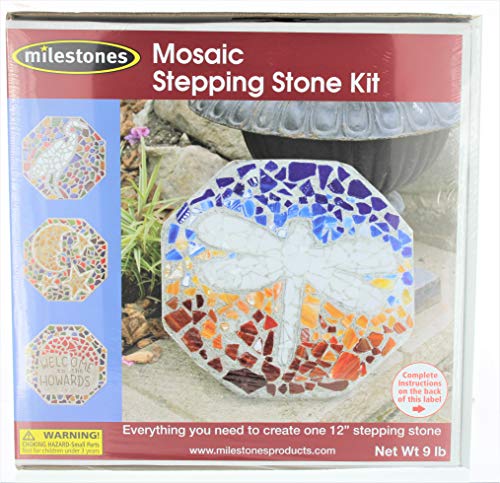
There are lots of fun mosaic stepping stone kits to create gorgeous stepping stones for your garden or yard. These would make a great family activity and experience to do together.
Click here for this one on Amazon.
Mosaic Wall Plaque

If you prefer to hang up the fruits of your labor indoors on a wall, this decorative mosaic wall plaque kit may be your best choice. It does not include nippers for trimming the tiles or PVA glue so you'll need to purchase those as well.
Click here for this kit on Amazon.
Tool Set

This set of nippers and tools can be used to trim glass and ceramic tile and lightly file the edges. The sponge and spatulas help get grout where it needs to go.
Click here for these tools on Amazon.
Make A Mosaic Frame
Do you like making projects with a purpose? Then consider doing a mosaic on an old picture frame. If you can find one that has a slightly concave front, that helps with holding grout. These photos give a pretty good illustration of the process using grout and glass mosaic pieces.
What Materials Can Be Used To Make A Mosaic?
The best part about the art of mosaics is how versatile a craft it is. If you can glue it down and spread grout around it, then it's fair game to be used in a mosaic. Of course, traditional mosaic tiles are either glass or ceramic.
But then you can use other things like buttons, old doll parts, and found objects. These types of mosaics are known as mixed media mosaics and are so satisfying to make.
Why not incorporate things from the natural world like tree branches and river rocks? We know the first mosaics ever made were created from earthen-toned pebbles.
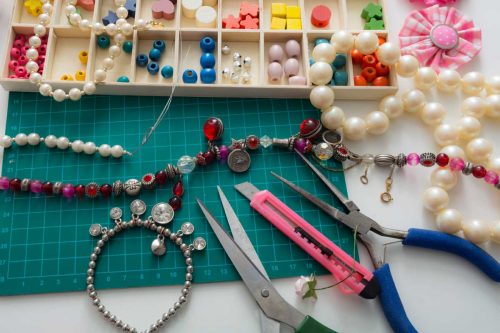
Beads are another great material to use in your mosaics. They're available in so many colors, materials, sizes, and styles. Mix them in with your other mosaic materials and really have fun shaking up your projects. The more you play around with the mosaic, the more detailed and complex you'll want to go.
How Do You Hang A Mosaic?
Now that your mosaic is complete, how do you hang it? If you've made a mosaic on a wooden craft blank, hanging it is pretty simple. Just get a standard picture hook and follow the instructions to install it on the back.

Click here for this small picture hanger on Amazon.
For heavier mosaics, you might want to go with a French Cleat type hanger. This secures it to the wall with anchors and screws and the interlocking French Cleat design gives you a flush hook for your mosaic to hang against the wall.
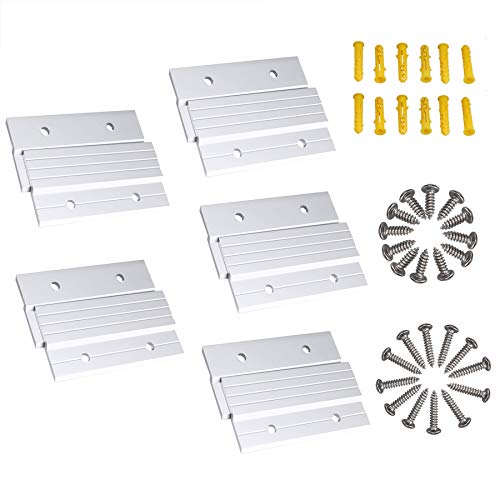
Click here for this picture hanging system on Amazon.
Get Creative With Mosaic!
As you can see, there are no real limits with craft mosaics. Start simple with a kit or a project on wood, then expand using found objects and other materials. Share the fun with your family by making magnets or stepping stones, then rummage through your junk drawer to find fun things to add to the imagery. But most of all, have fun with it while you learn.
If you enjoyed this post here at CraftsBliss.com please check out a few of our other posts below:
![Read more about the article Can You Glue Ceramic Back Together? [And How To]](https://craftsbliss.com/wp-content/uploads/2023/01/Hand-applying-liquid-glue-on-ceramic-broken-pieces-repairing-a-green-plate.-Can-You-Glue-Ceramic-Back-Together-And-How-To-500x333.png)