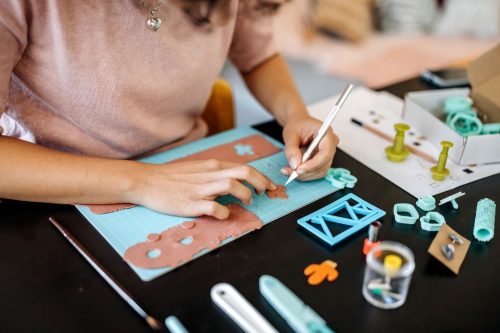
Glass beads are a wonderful crafting material with a wide variety of potential uses. Many people enjoy creating mosaics, decorating room dividers, or creating their own version of stained glass windows with them. But you may be wondering how to glue them to a glass surface. We've researched the process and we have the answer for you.
To glue glass beads to a glass surface, you must follow a few steps. Each step must be followed correctly if you want your beads to adhere well and remain attached for an extended period of time.:
- Select the proper glue
- Sand the surface [optional, but produces best results]
- Clean well
- Wipe with rubbing alcohol
- Apply glue
- Allow to fully dry
In this guide, we'll go into more detail on the process, discuss some extra steps that may be necessary with certain types of glue, and offer some ideas for crafts you can do with glass beads. So, read on.
![Different colored glass beads on a white background, How To Glue Glass Beads To Glass [6 Steps]](https://craftsbliss.com/wp-content/uploads/2020/10/How-To-Glue-Glass-Beads-To-Glass-6-Steps-1.jpg)
Gluing Glass Beads To A Glass Surface
When using glass beads in your crafts it is important to follow the proper procedure to securely attach them. That is especially true if attaching them to a glass surface. Follow these steps and you will be able to achieve a firm bond that will hold up for many years to come.
Select The Proper Glue
Glass is a difficult surface to glue to. It is slick and non-porous, which makes it hard for most glues to get a grip on. But there are some glues that work very well with glass, and even some specifically designed to work with glass.
Here are some of the best and most recommended glues we found for attaching glass beads to a glass surface:
E6000
E6000 is one of the most often mentioned when looking for good glues for gluing glass to glass. It is slow drying, which allows some time to position the item you are gluing. Secure the item you are gluing in place for 48 hours to allow it to fully cure.
When it has cured, E6000 is clear, flexible, waterproof, and paintable. For some projects, this may be what you want, but there may be times when you do not want a flexible end result.

Click here to see this product on Amazon.
Loctite Glass Glue
Not as many people recommend Loctite glass glue as recommend E6000, but if you are looking for a quicker bond, this could be your best choice. It dries quickly, is clear, and is a cheaper choice than most glass glues.

Click here to see this product on Amazon.
Gorilla 2-Part Clear Epoxy
This 2-part epoxy will work very well on glass. Unlike the others, you squeeze the epoxy onto a disposable surface to mix before use. It sets in 5 minutes, so you can move on quickly, but it doesn't fully cure for about a day. This epoxy will fill larger gaps than the other glues and it sets hard.
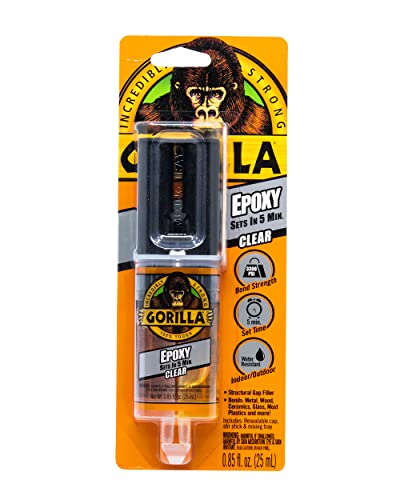
Click here to see this product on Amazon.
Sand The Surface
Because glass is a very slick and non-porous surface, you will get a much better bond between the pieces if you can sand them. This may be difficult when working with glass beads, but if you can scuff the surface of the glass you are gluing to, at least the glue will adhere better to that surface.
Many crafters skip this step without any problems. It will provide a more secure hold, but that may not always be necessary. It's an option you may want to keep in mind.
Clean Well
Use soapy water, or a good cleaner of some kind, to clean the glass you are gluing to. You need to remove any old glue from labels, dirt, dust, etc. Otherwise, you'll just be gluing your glass beads to the dirt and grime on the glass surface, not the glass. The end result may be loose beads with a coat of dirt permanently attached to them.
Wipe With Alcohol
After you clean the glass and let it dry, wipe the surface you are gluing to and the beads with rubbing alcohol. This will remove any oil left behind from you touching the surfaces and any remaining residue from the cleaner.
Apply Glue
Once you have a dry, clean, oil-free surface, you can start to get your glue and beads ready to apply. If your glue is the type that you mix before applying, make sure to mix it thoroughly at this point. If possible, test out where each piece will go before you start to apply the glue.
You can apply the glue to the beads, the surface, or both. This may depend a lot on the size of your beads, the type of glue you are using, and the nature of your project. Small beads would be difficult to glue individually, so you may want to apply the glue to the surface. If you are gluing single, large beads and don't want excess glue showing around them when finished, you will have better luck applying glue only to the beads before placing them on the glass.
Allow Glue To Fully Dry
Many types of glue take several minutes or more to dry. During this time, you need to refrain from moving the object you have the glass beads glued to. Sometimes this can take a day or more.
Some glues, such as the 2-part epoxies and some others, will dry enough to move the item a little in just a few minutes, but need to cure a full 24 hours before they have hardened completely. You may have to glue one area, then tape the beads on or leave everything in place for a day or more before handling anything. Read the instructions for your chosen glue carefully, and don't try to rush matters.
The process is complete once you have glued all the beads and allowed everything to fully cure. This video shows the entire process:
DIY Crafts With Glass
Glass can add a little sparkle to almost anything. You can also create your own interesting and unique DIY items with them. The possibilities are endless. Here are some wonderful glass-on-glass craft ideas we found for you:
Decorative Bowl
Break out those colorful glass beads to create a one-of-a-kind decorative bowl.
Stained Glass
You can take your stained glass to a whole new level with the addition of glass beads.
Glass Animals
Create your own fun glass animals by gluing together pieces of glass.
Mosaic Clock
Telling time no longer has to be dull. Let glass beads do some talking with their colorful hues.
Artwork
Artwork can get its own unique spin with the help of glass beads. The additional glass brings more texture to the piece.
These are only a handful of ideas for glass-on-glass bead crafts. The only limit is your imagination, so free yourself to be creative.
Can Gorilla Glue Be Used On Glass?
You can use Gorilla Glue to glue glass. When gluing glass, you need to keep in mind that it is non-porous. This means your bond won't be as strong as it is on a more porous surface.
To get the best result, sand the glass lightly before gluing, if possible. When gluing to non-porous surfaces such as this, dampen the surface lightly with water before applying the Gorilla Glue. Make sure to clamp the items together for at least 2 hours, and allow 24 hours for the glue to fully cure.
What Glue Dries Clear On Glass?
If you are gluing to glass, you may want a glue that isn't going to show too much. Usually, a glue that dries clear will work out best. There are several good options for you to choose from, but some of the best we have found and have discussed include:
- Loctite Glass Glue
- E6000
- Gorilla 2-Part Epoxy
With any of these, you can expect a good bond to your glass, and they all dry clear.
In Closing
You can glue glass beads to a glass surface by following the steps we have outlined in this post. Make sure to use a good glue, such as those we mentioned, and allow your project to sit undisturbed to cure for the required amount of time listed in the instructions for your glue.
![Read more about the article Is Glass Blowing Expensive? [Price ranges discussed]](https://craftsbliss.com/wp-content/uploads/2020/10/A-glass-blowing-artist-forms-a-blob-of-glass-into-a-vessel-using-a-gas-torch-500x333.jpg)
![Read more about the article How Much Sewing Thread Do You Need For A Project? [Here’s How To Tell]](https://craftsbliss.com/wp-content/uploads/2020/12/assorted-and-mutilcolored-spools-of-threads-in-a-table-How-Much-Sewing-Thread-Do-You-Need-For-A-Project-Heres-How-To-Tell-500x333.jpg)